Manta Ray DIY Pendant Paperlamp Kit - Ceiling Hardwired Version
Tax included
Shipping calculated at checkout
And now introducing Samantha, the Manta!
With a wingspan of up to 9 meters, this elegant lady is a gentle giant of the ocean. She calmly drifts through the sea spreading out her immense cloak-like body... you could disappear under her embrace! Maybe we'd rather try riding along, sitting on her back - imagine that!
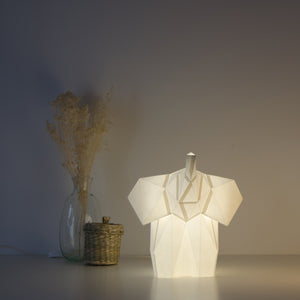
Our Manta Ray paperlamp consists of a papercraft kit for you to build the model. Either with friends or individually, enjoy bringing to life one more member at your home. Make sure to take a few hours to assemble your Manta Ray paperlamp – best results always require some dedication!
Dimension: 55cm x 41cm x 55cm
Difficulty: ●●●○○ /34 pieces
Details
This item is a DIY (Do It Yourself) papercraft kit, containing a pre-cut paper model and a ceiling light fixture with an E27 light bulb socket and 1,0 meter electrical cable. Also included is an assembly guide and a practice model. In case you wish to receive a different cable length, get in touch with us.
It is mandatory that you only use LED light bulbs or equivalent energy saving light bulbs that do not generate heat. These should have an E27 fitting, which is a european standard that might not be available in your country (e.g. US, Canada and Japan). Please check beforehand, as you can choose to include an adequate light bulb in your kit from the Electrical Set sidebar.
The paperlamps are made with high quality 160g paper that contains cotton and presents good resistance and durability. A variety of colours is available, so take a look at our colour palette at the end of the slideshow. If you look closely, you may notice the small assembly numbers when the paperlamp is lit, as we mostly use bright coloured paper.
Product language: English only.
For more information, check our FAQ or contact us!
Shipping
We will process your order in 1-5 business days after receipt of payment. Customers have two shipping options:
-
-
- Standard Mail
- DHL Express Mail
-
Both options include a tracking number and a shipping notification will be sent to you with this information. In case you choose standard mail, the package will be sent through the Portuguese Post service and distributed by each country’s Post service.
The DHL service already includes customs clearance for non EU countries.
The estimated shipping times are the following:
-
-
- DHL Express Mail: 1-3 business days
-
- Standard Mail, according to the Portuguese Post:
-
- PORTUGAL: 2-3 business days
- EUROPE: 4-12 business days
- NORTH AMERICA: 7-20 business days
- REST OF THE WORLD: 10-25 business days
-
- Standard Mail, according to the Portuguese Post:
-
Keep in mind that the overall delivery time adds up the order processing time and the shipping time.
All addresses are directly copied and pasted, so it is very important to provide the correct and complete address. For more information, check our Shipping & Returns Policies at the bottom of this page or contact us!
Assembling
How long will it take to assemble an OWL paperlamp?
You will spend a few hours assembling your paperlamp, so take time to do this in a relaxed way. Consider taking breaks between steps – there’s no need to rush.
Every model requires different assembly durations, depending on the complexity, size or number of pieces. Also, have in mind that some people are more experienced with papercraft and model making. Most importantly, test your glue and skill on the practice model, so you feel more comfortable when you move on to your paperlamp.
With some patience and dedication you will be happy with your result!
Which auxiliary tools do I need?
To crease the paper you will need a sharp end that does NOT cut (like the metal tip of a mechanical pencil) and a ruler. You will also need glue to put the model together. We recommend UHU® All Purpose Adhesive glue or other equivalent glue types.
These items are not included in the kit.
How do I crease, fold and glue the paper pieces?
Before you start, make sure you are working on a flat, clean surface and that all your tools are also clean.
To help crease the paper use a sharp end that does NOT cut and a ruler. Face the printed side of the paper towards you and mark all the lines, then fold according to the type of line indicated.
Try the individual pieces on the model before gluing. Test your glue on a small area or on the practice model, so you know the correct amount you should use. Always place the glue on the reverse side of the printed paper, matching the flap numbers on the inside of the model.
Follow the assembly order given in the instructions guide. See more information on how to assemble, your paperlamp here.
If you have any difficulty, contact us and we’ll give you our best support.
"This is the second lamp from this company I've bought. I love the craftsmanship and the results! I'm always happy to make them!"
Lisa
Etsy buyer on 25 Jul, 2025
"Top notch! You have to be meticulous and patient but the result is great! Thank you"
Clara
Etsy buyer on 22 Jul, 2025
“Easy to make and so beautiful! Looks perfect :)”
Victor
Etsy buyer on 30 Aug, 2025
"Assembly was a little more difficult than expected, but the result is absolutely worth it! Very beautiful "
Karoline
Etsy buyer on 02 Jun, 2025
"It takes patience and, in some places, a little skill to fold and connect the individual pieces. It is definitely helpful to use both the written and video instructions. The result is worth it!"
Stevie
Etsy buyer on 14 Sep, 2024
“Perfect gift. Looks really awesome!”
Teemu
Etsy buyer on 12 Aug, 2025
“Cute unique lamp with great customer service.”
Jonathan
Etsy buyer on 22 Jul, 2025
“Great! Very nice after a day of crafting.”
Laurence
Etsy buyer on 17 Jul, 2025
Our DIY Paperlamp Kits
Each paperlamp is a DIY (Do It Yourself) papercraft kit for people to build the lamp. The kits include a pre-cut paper figure, electrical set, an assembly guide and a practice model.